


Transforming a simple table into a visually stunning centerpiece can elevate any occasion, whether it’s an everyday meal or a special event. Have you ever wondered how to make your table look truly magnificent? Whether you’re hosting a casual dinner, preparing for a holiday gathering, or setting the stage for a romantic evening, the art of table setting can make all the difference. From essential tools to sophisticated decorations, this guide offers expert tips and tricks to help you create a table that wows everyone around it. Discover how to set a beautiful table for any occasion, incorporating elegant designs, practical advice, and timeless style that will leave your guests in awe. Let’s dive into the world of table setting, where every detail matters and beauty meets functionality.
Key Takeaways: How to Make Your Table Look Beautiful
- Utensil Placement Basics: Position the fork on the left side of the plate, above the napkin. The knife goes next to the fork, slightly away from the plate, and the spoon is positioned on the right side near the knife. Place the water glass above the knife for easy access.
- Advanced Fancy Touches: Use a decorative napkin ring to hold the napkin, adding polish to your table setup. Position the water glass closer to the plate for a streamlined look. Place the wine glass or another beverage glass above the water glass but not too high to avoid clutter. Use a small plate on the left for bread or crackers, accompanied by a basket nearby. Include a salad fork or a small spoon for greens or soups.
- Formal vs. Casual Arrangements: In formal settings, the fork is placed vertically on the left, knife blade pointing downward, and the salad fork is on the left for greens. In casual settings, the fork is placed horizontally on the left, knife on the right, and spoon on the right side.
- Presentation Tips: Use a coaster under glasses to prevent water rings. Arrange glasses diagonally to the right of the plate for a sophisticated look. Consider the order of courses, starting with appetizers, followed by mains, and ending with desserts, each with their own utensils.
- Napkin Placement: Typically, the napkin is placed on the left side of the plate for symmetry and ease of access, especially for right-handed individuals. However, personal preference may vary.
- Romantic Dinner Setup: Create an intimate atmosphere with dimmed lights, soft candles, and a decorative centerpiece. Use fine china, multiple glassware options, polished silverware, and crisp linens. Plan a five-course meal and prepare conversation starters or background music to enhance the mood. Add personalized touches like a handwritten note or custom dessert menu for a memorable evening.
How to Make Your Table Look Beautiful
To make your table look beautiful, follow these simple yet effective tips:
- Choose a Stylish Font:** Select a clean, modern font like Arial, Calibri, or Times New Roman for better readability and aesthetics.
- Use Contrasting Colors:** Opt for a contrasting color for the header row to make it stand out, while keeping the rest of the table neutral or using subtle accents.
- Align Text Properly:** Ensure all text within cells is aligned vertically and horizontally for a neat and professional appearance.
- Add Decorative Elements:** Enhance your table with decorative borders or shadows available through your software toolbar, but avoid overdecorating to keep it clean.
- Apply Themes or Templates:** Utilize pre-designed themes or templates in your software to quickly achieve a polished and professional look.
- Organize Data Logically:** Arrange data in a logical order and categorize rows to improve readability and navigation.
- Add a Title or Caption:** Include a descriptive title or caption above the table to provide context and make it more intuitive for viewers.
- Use a Legend if Necessary:** If certain columns have special meanings, add a legend or key to clarify their significance.
- Format Numbers Consistently:** Align numerical data to the right and use commas for thousands separators to enhance readability.
- Review for Errors:** Double-check the table for any typos, misalignments, or formatting issues before finalizing it.
How to Set a Beautiful Table
Setting a beautiful table involves attention to detail and thoughtful planning to create a visually appealing and inviting atmosphere. Here’s a step-by-step guide to help you achieve this:
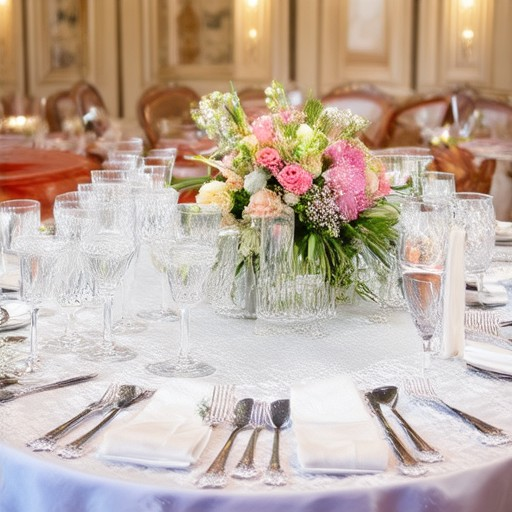
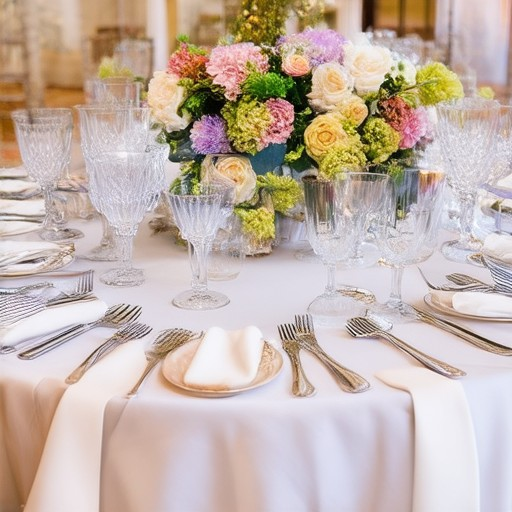
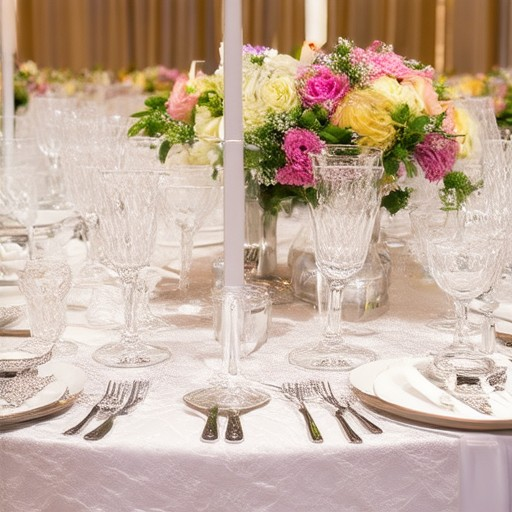
- Centerpiece : Choose a decorative item for the center of the table. Options include flower arrangements, candle displays, or artistic setups like fruit carvings. Ensure the centerpiece complements the table’s decor and doesn’t overshadow the food.
- Table Linens : Use a fitted tablecloth or placemat to cover the table. Opt for colors that align with your overall theme, ensuring they match your plates and glassware for cohesion.
- Lighting : Position overhead lighting to avoid glare. Consider adding table lamps, candles, or string lights for softer illumination that enhances the ambiance.
- Decorative Elements : Add decorative accents like vases, artwork, or small sculptures. Arrange these symmetrically around the table for balance and visual appeal.
- Personal Touches : Include personalized elements such as monogrammed napkins, custom place cards, or a handwritten menu. These details add a unique touch and make the occasion feel special.
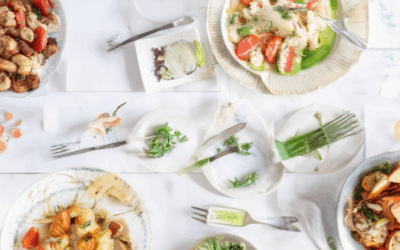
- Food Presentation : Arrange dishes and platters neatly on the table. Use uniformity in spacing and height to ensure the setup looks organized. Consider artistic plating techniques to elevate the meal’s appearance.
- Background : Keep the table surface clean and free of clutter. Use a tablecloth to protect the surface and tie it in with your chosen color scheme.
- Courses and Serving : Arrange each course separately, ensuring dishes are spaced evenly. Use separators or dividers if needed to keep everything organized and visually balanced.
- Utensil Placement : Place silverware and glasses strategically, often on the left side of the plate. Ensure they are aligned and easily accessible without cluttering the table.
- Greenery : Incorporate fresh herbs, small plants, or flowers into the centerpiece or as decorative elements to add life to the table.
By focusing on these elements, you can create a table that is not only functional but also a stunning focal point of your gathering. Whether it’s a formal dinner or a casual get-together, attention to detail will make the difference.

The 7 Essentials to Setting a Table
Setting a table effectively is crucial for creating a memorable dining experience. Here are the key components to master:
- Preparation: Begin by cleaning and sanitizing your table. Set the place settings, including plates, utensils, glasses, and napkins. Arrange decorative elements like centerpieces or candles to enhance the ambiance.
- Layout: Create a balanced arrangement by spacing forks, knives, and teaspoons evenly around the plate. Place the salad fork on the left side and the dinner fork on the right. Align glasses and water pitcher appropriately.
- Am Ambiance: Use lighting, music, and scented candles to set the mood. A well-lit table ensures visibility while soft lighting adds warmth. Consider playing background music to complement the meal.
- Seating Arrangements: Seat guests according to their preferences or dietary restrictions. Place cards should be placed to the right of each seat for easy identification. Ensure comfort by adjusting chairs and spacing.
- Centerpiece and Decorations: Choose a visually appealing centerpiece that complements the table decor. Use flowers, candles, or artistic arrangements to add depth to the table setting.
- Conversation Starters: Prepare discussion topics or questions to engage guests. Place a small bowl of mixed nuts or a bread basket on the table for snacking between courses.
- Clean-Up: After the meal, remove used dishes and utensils promptly. Wipe down the table and reset it for the next course or dessert. Ensure the table looks inviting throughout the meal.
Fancy Table Setting Guide
To set a table in a fancy manner, follow these organized steps for an elegant dining experience:
- Utensil Placement Basics:
- The fork is placed on the left side of the plate, just above the napkin.
- The knife is placed next to the fork, slightly away from the plate.
- The spoon is positioned on the right side of the plate, near the knife.
- A water glass is placed above the knife for easy access.
- Advanced Fancy Touches:
- Napkin Ring: Place a decorative napkin ring on the plate to hold the napkin, adding a polished look.
- Glass Arrangement: Position the water glass closer to the plate for a streamlined appearance. Place the wine glass or another beverage glass above the water glass but not too high to avoid clutter.
- Bread Plate and Basket: Use a small plate on the left side for bread or crackers, accompanied by a basket nearby for additional bread items.
- Serving Utensils: Include a salad fork on the left side for leafy greens or a small spoon for soups or desserts.
- Formal vs. Casual Arrangements:
- Formal Setting: Fork is placed vertically on the left, knife blade pointing downward. Salad fork on the left for greens.
- Casual Setting: Fork placed horizontally on the left, knife on the right, and spoon on the right side.
- Presentation Tips:
- Use a coaster under glasses to prevent water rings.
- Arrange glasses diagonally to the right of the plate for a sophisticated look.
- Consider the order of courses, starting with appetizers, followed by mains, and ending with desserts, each with their own utensils.
Does the napkin go on the left or right?
Typically, a napkin is placed on the left side of the plate, aligning with standard dining etiquette and conventions. This placement ensures symmetry and ease of access, particularly for right-handed individuals who often use their right hand for eating.
While personal preference may vary, the left side is generally the expected position for a napkin. Like other items such as forks and glasses, it is positioned to the left of the plate, reflecting a consistent approach to table setting arrangements.
If you’re unsure about table settings or want to learn more about proper dining habits, Memories Restaurant offers valuable insights and tips to enhance your dining experience.
How To Set Up A Table For A Romantic Dinner
To create a memorable and romantic dinner setting, focus on creating an intimate atmosphere with thoughtful details. Here’s a step-by-step guide to setting up your table:
- Lighting Setup: Begin by dimming the room lights and placing soft LED candles or flameless candles in the center of the table. This creates a warm and inviting ambiance.
- Centerpiece Arrangement: Select a decorative centerpiece that reflects your shared interests, such as a floral bouquet, a candle arrangement, or a personalized display like a photo frame with a cherished memory.
- Table Settings: Use fine china or unique serving pieces to add elegance to your table. Include a variety of glassware options for water, wine, and cocktails, along with polished silverware and crisp linens like napkins, placemats, and a stylish tablecloth.
- Menu Preparation: Plan a five-course meal featuring appetizers, main courses, and desserts. Consider dishes like antipasto skewers, filet mignon, or seafood risotto, paired with complementary wines and cocktails.
- Conversation Starter: Prepare a list of thought-provoking questions or topics to spark meaningful conversation. You might also consider playing background music or a curated playlist to enhance the mood.
- Final Touches: Add personalized elements such as a handwritten note or a custom dessert menu. Conclude the evening with a heartfelt toast or a personalized message to leave a lasting memory.
By focusing on these details, you’ll create a romantic dinner setting that is both intimate and unforgettable.

0 Comments